Recently I sold my 2017 iMac with a 2 TB fusion drive, and upgraded it to a m1 MacBook Air with a 256gb SSD.
Before selling, I was able to backup my drive to time machine, but the file size was 1.5 terabytes.
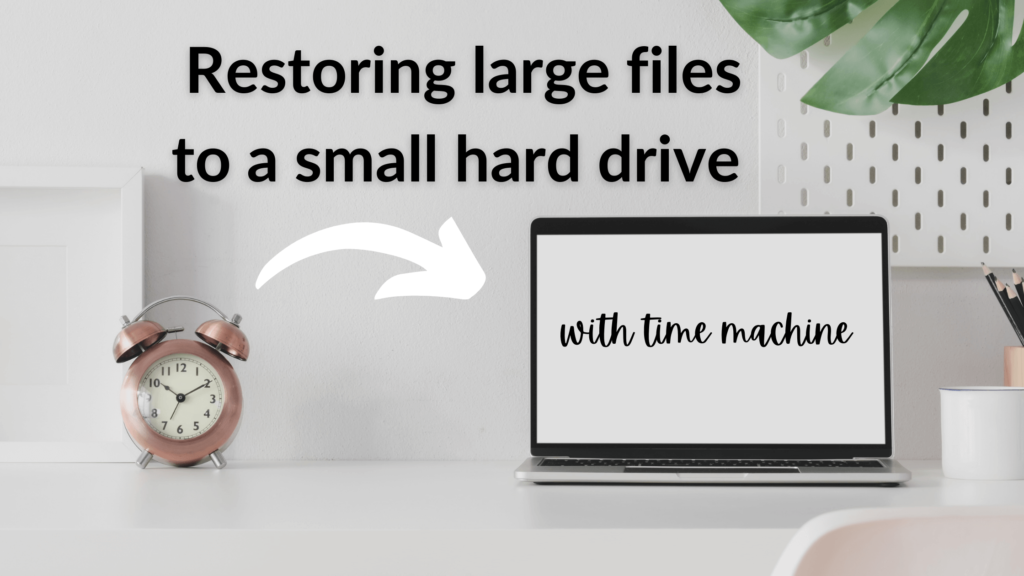
How can a time machine backup from a 2 TB fusion drive restore important files on a smaller SSD MacBook?
And how can I redirect the other files to an external hard drive?
In this post, I’ll explain 2 easy ways to backup your time machine files to a smaller Mac.
The easy way to backup time machine files to a smaller HD
After buying my new MacBook I thought the best solution was to reinstall macOS on a 2 TB bootable external drive, and restore time machine to that disk. That way I could transfer the 2 TB worth of data from my iMac to a bootable external drive.
This seemed simple but time consuming, and after thinking this through I discovered a much simpler method..
Step #1 Back up time machine
First, make sure you back up to 3 locations. Ideally, you want a time machine backup, a separate backup of important files, and a cloud backup.
I back up my files to a cheap external time machine drive, and I have a second backup on my Synology NAS. Using a NAS is probably the simplest way to backup your time machine files.
Step #2 Restore time machine to new Mac
When you start your new Mac, go ahead and begin restoring your time machine backup.
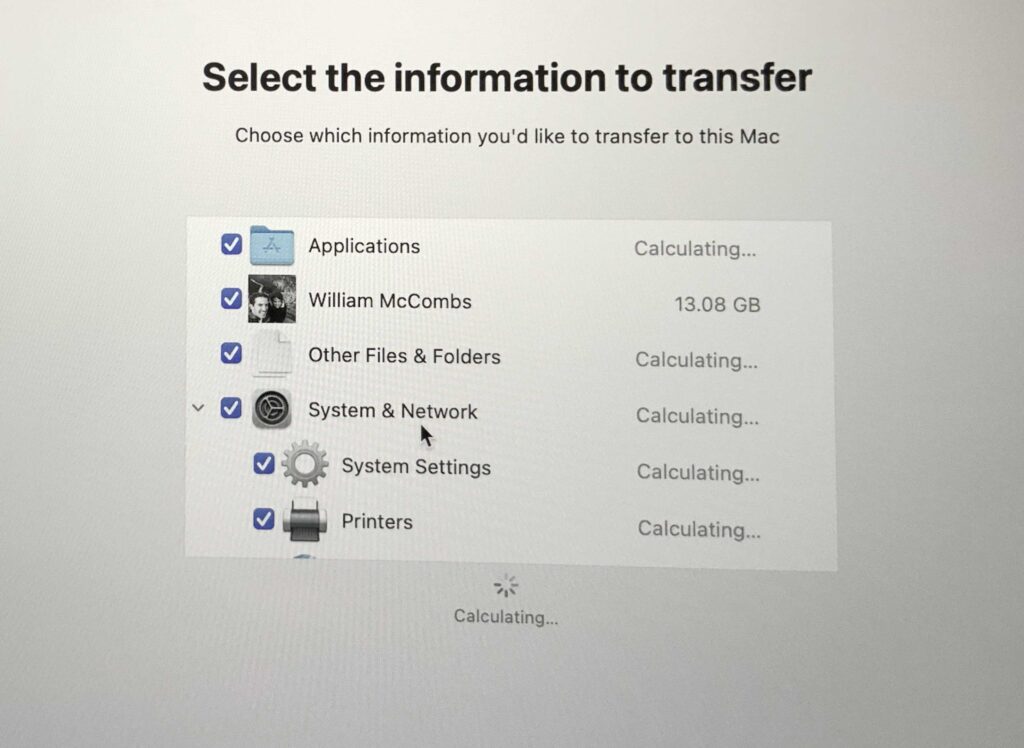
You don’t have to restore everything on time machine, just the files you need.
You will have a screen asking what you want on your new Mac. This will include files such as applications, documents, photos, etc.
Choose the important applications and files you want on your new computer, and don’t forget to click the drop-down menu to unclick additional files you may not need.
You may only want to include applications, documents, and other important files. Avoid transferring larger files such as photos, videos, and music files.
Next, click restore, and wait for your new Mac to be setup.
*make sure you don’t erase your time machine drive after the files have been restored to your new computer. You will want to keep the existing time machine backup, so you can begin transferring the additional files to your hard drive.
Step #3 Transfer files from time machine to external drive
Now that your computer is setup with your previous backup, begin transferring the additional files from time machine to an external hard drive.
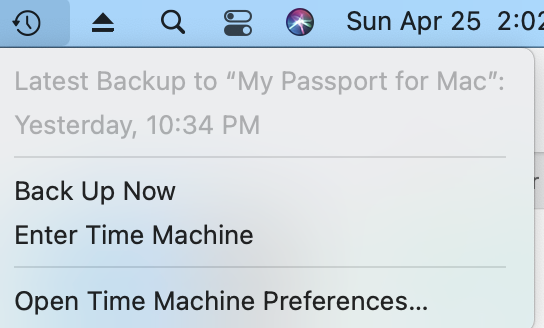
Make sure your time machine HD is connected to your Mac.
To do this, click on the time machine icon on the task bar at the top of your screen.
Next, click “enter time machine.”
After you enter time machine you will want to go to the previous date when you backed up your previous Mac. Click on the previous date, and find the files you need to copy to the external hard drive. You can copy your files by just selecting them with command C or you can select the files and click restore.
Next, locate the folder on your external drive and paste the files. Simple right?
How to restore files from an old Mac without time machine
I’m not a huge fan of using time machine, because when I buy a new Mac, I want a fresh start.
So how do you get old Mac files on the new one?
1st method (Preferred)
Connect time machine, and do a complete backup on the old Mac. After setting up the new Mac without time machine, connect it, and transfer the files as I mentioned above.
2nd Method
Transfer the old Mac files directly to an external HD. When you setup the new Mac, transfer the files you need back to the new machine.
Conclusion
The process to transfer files from an older Mac with a larger hard drive to a new Mac with a smaller hard drive is easy with time machine.
Make a time machine backup, connect it the new Mac, choose the files you need, and recover the files you don’t need by entering time machine.
If you don’t want time machine to transfer to the new Mac, then use it after setup to migrate files you want to keep.
I hope this was helpful. If you’re interested in using a NAS for your time machine backup, check out my other post where I compare my favorite Synology NAS.